
Appendix 30: Image Installer Utility
Instructions for the Image Install Utility for 4mation
This utility program copies images (for 4mation to use) from YOUR folder of pictures to someplace that 4mation can find/use them. It also adds the new folder (location) into the choices of picture folders for 4mation (so they can be selected at tailoring time). It is not completely automatic (you have to specify from/to locations and still run the EEGer Game Initialization Tool and such) but you only need to click the Done/Save buttons. Also, remember that the pictures need to be installed on the computer that has the game screen attached (on a 2-computer system, that would be the game computer).
The utility is available from www.eeger.com <http://www.eeger.com/> (Click on the Downloadable Files and Updates page, then click on Handy add-on utilities for EEGer). It may also be pre-installed in EEGer.
Once installed, the utility itself can be started from the Start menu (EEGer->Image Installer). Recent EEGer versions also have a start option in the Tools menu. Once the install utility is started, you get a screen like this which lets you pick where the pictures are that you want to install for 4mation.
Select a folder and click on OK. The utility will examine the folder contents and report how many valid pictures are available.
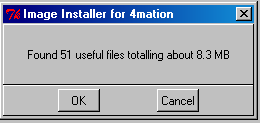
Please note that the utility will NOT copy pictures larger than 1600x1200 pixels since that requires too much time/video memory for 4mation.
Now you are prompted to select a destination (on your computer) for the pictures to be copied.
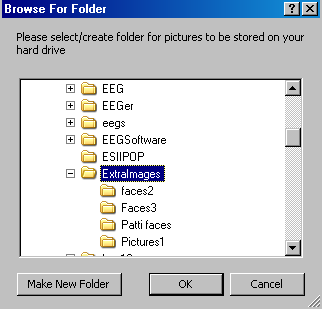
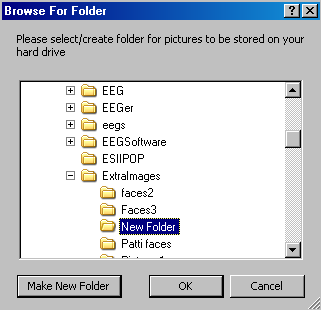
The default location is a folder called "C:\ExtraImages". You should select or "Make New Folder" a recognizable folder name for the destination. "New Folder" is only a "good" name once.
The utility will check to see if the folder is empty:
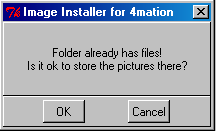
Then the files will be copied from the source you specified to the destination you specified. The utility will update the game definition file for 4mation to include the new folder.
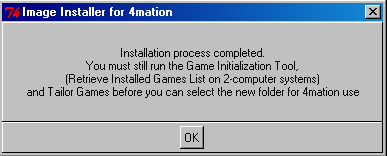
Then, you get a reminder that EEGer will NOT know about these new folders until the Game Initialization Tool is run.
You can repeat the installation process for multiple folders before running the Game Initialization Tool.
This is the process for running the Game Initialization Tool:
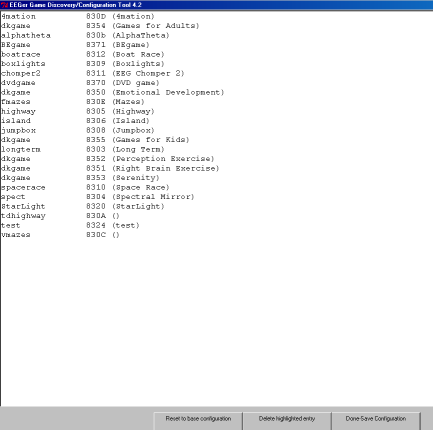
l On the computer that will display the games, open the Game Initialization Tool. [Select Start-All Programs. Choose the EEGer folder, then Game Initialization Tool.]
Note: the utility has already added the correct picture folder paths for you.
l
l Click Done-Save Configuration to complete the changes for game setup.
l Finalize the changes for the Therapist software.
l
1. Single Computer:
Select Tools-Tailor Installed Games and
click SAVE All Games.
ii. Two-Computers:
Select Tools-Retrieve Installed Games then select Tools-Tailor Installed Games and click SAVE All Games.
CHOOSING CUSTOM IMAGES
Option 1: Change images for the current session only
l Select the client and click Begin Session.
l On the game selection screen, click the Edit button next to 4mation.
l Scroll down to find "Image directory to use" in the left-hand (numbered 1100). Click either the left or right column to select the "button" to edit the directory choice.
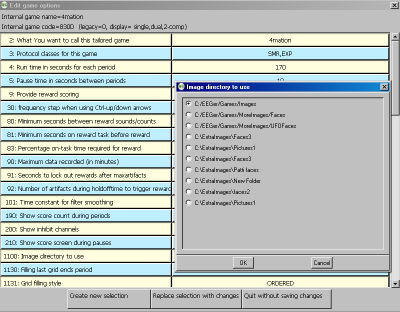
l Select the image source you want to use by clicking the radio button next to the pathname. (The default is c:\EEGer\Games\Images).
l Click OK to save.
l Click Use these changes for this game run to confirm your choice.
l Select 4mation to start the session.
l
Option 2: Change images for all sessions
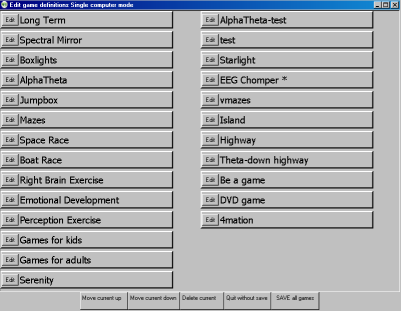
1. Select Tools-Tailor Installed Games.
2. On the Edit Game Definitions screen, click the Edit button next to 4mation.
3. Scroll down to find "Image directory to use" in the left-hand (item 1100). Click either the left or right column to select the "button" to edit the directory choice. (See image above.)
4. Select the image source you want to use by clicking the radio button next to the pathname. (The default is c:\EEGer\Games\Images).
5. Click OK to save.
6. Click Replace Selection with changes to confirm your choice.
7. Click SAVE all games.
8. Choose 4mation when you run a session.
Option 3: Create a separate game definition with different images
1. Select Tools-Tailor Installed Games.
2. On the Edit Game Definitions screen, click the Edit button next to 4mation.
3. The first line is "What You want to call this tailored game". Click either the left or right column to select the "button" to edit the name.
4. Enter a name that will help you identify the choice (e.g., "4mation Animals" or "4mation on USB") then click OK to save.
5. Scroll down to find "Image directory to use" in the left-hand (item 1100). Click either the left or right column to select the "button" to edit the directory choice. (See image above.)
6. Select the image source you want to use by clicking the radio button next to the pathname. (The default is c:\EEGer\Games\Images).
7. Click OK to save.
8. Click Create a new selection to create a copy of the default game setup.
9. Click SAVE all games.
10. Choose the 4mation name you just created when you run a session.